UE5 PolyDecompose VFX
Two VFX where a mesh takes itself apart into the polygons that build it. The mesh forms from its primitive shapes first, then breaks back down into them. Most of the work was sampling the mesh data onto a particle generated from each polygon so the cloud accurately reads as the original mesh, all done in Niagara. One version turns the squares into triangles, the other keeps them square and scales each one randomly.
Polygons forming, then decomposing into triangles
Table of Contents
Sampling the Mesh in Niagara
This was the real work. To rebuild the mesh out of particles I had to recover the mesh's primitive data inside Niagara and apply it back to the particles I spawn, one per polygon. Each particle needs to know where its polygon sits, how it is oriented, and what the surface looks like there. Otherwise you just get a blob of points instead of a recognizable figure.
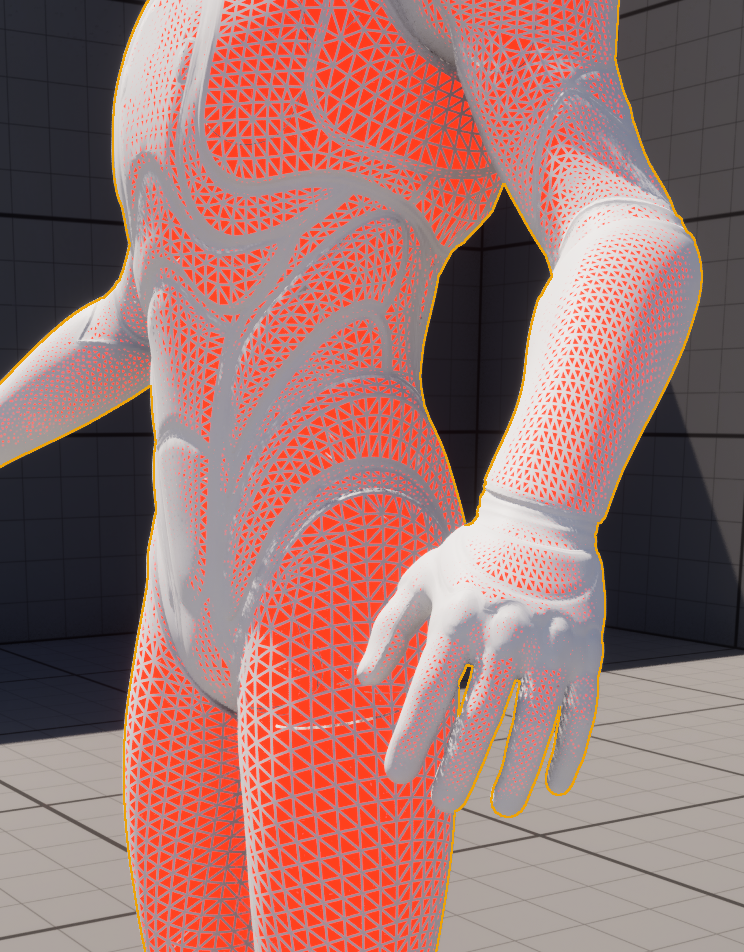
Reading per-triangle data off the mesh
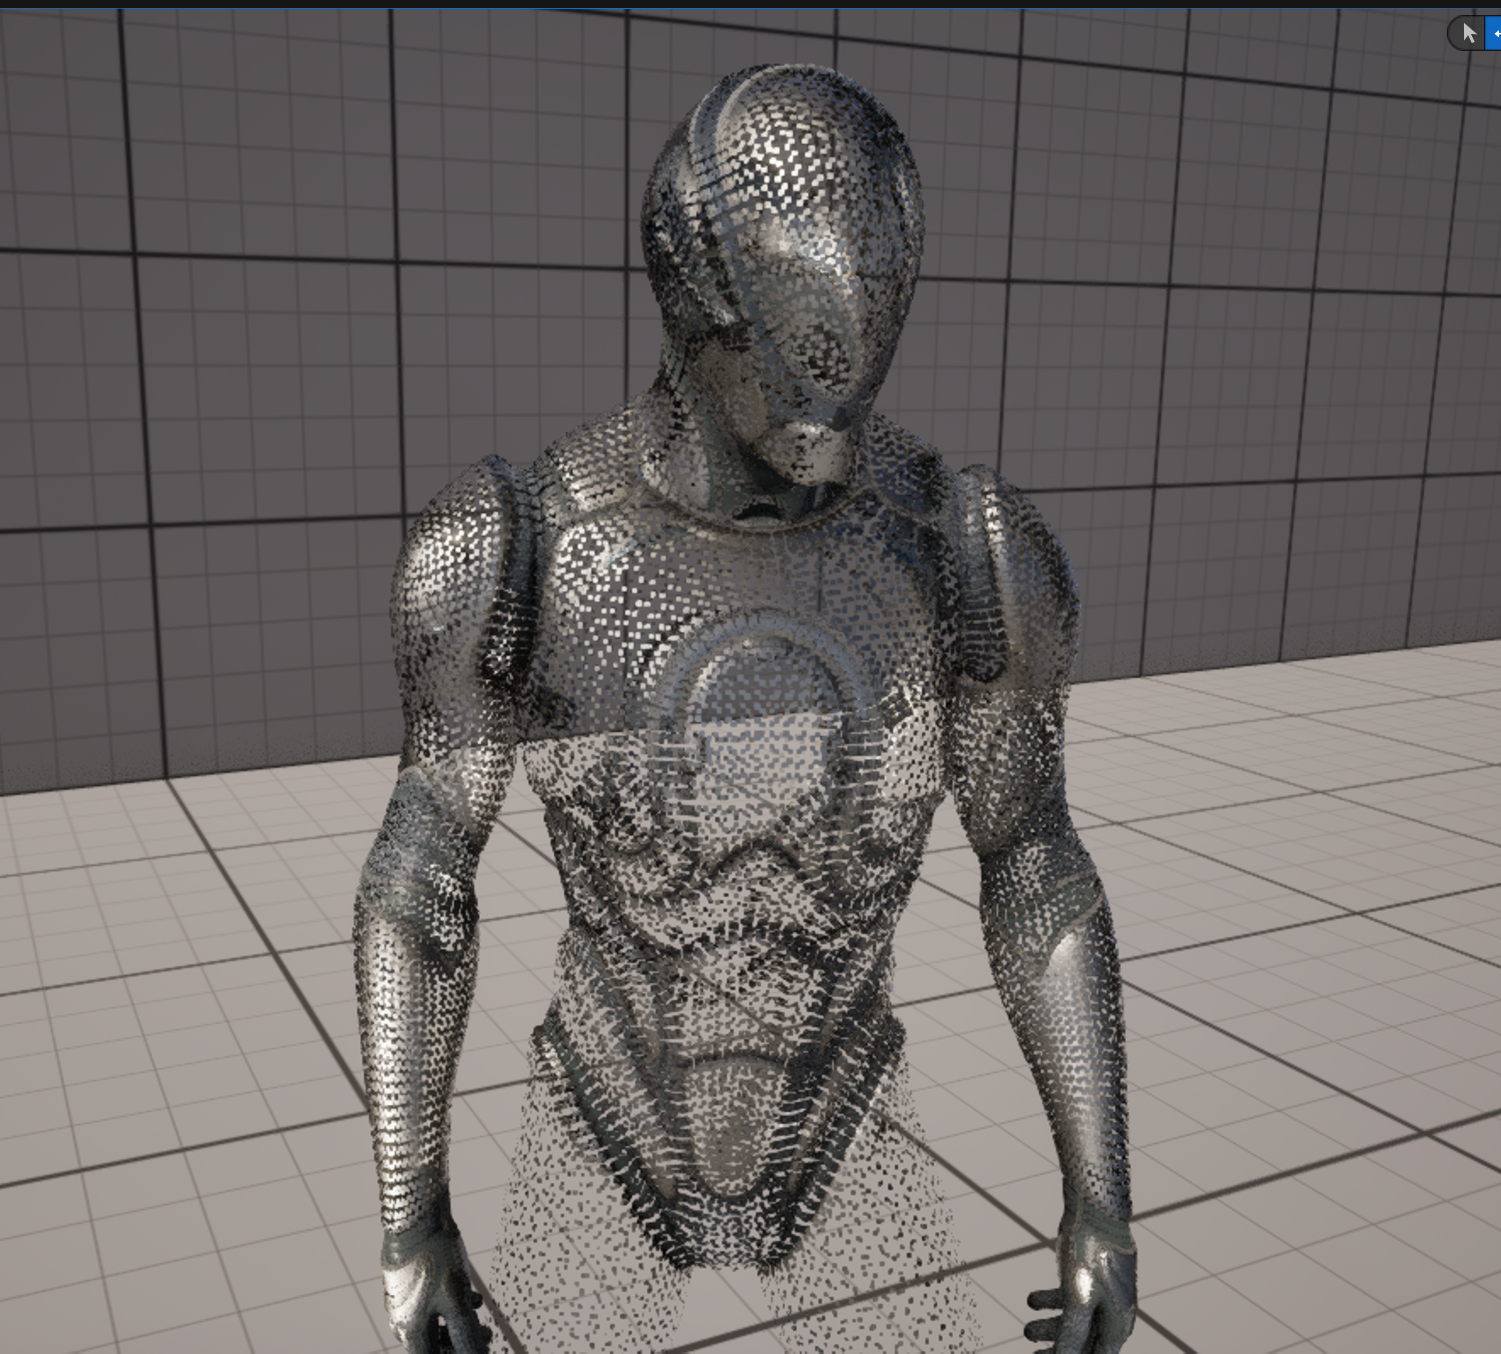
Particles sampling the surface to rebuild the look
For each polygon I read the skinned triangle data at its three corners, which gives me the exact vertex positions and normals. Those three vertex coordinates get packed into the particle's dynamic parameters, then the material unpacks them back into VertVec1, VertVec2, and VertVec3 to rebuild the triangle. Once the particles could read that data and sample the source surface, the point cloud held the shape and the material of the original mesh, and the forming and decomposing motion was just animating those values over time.
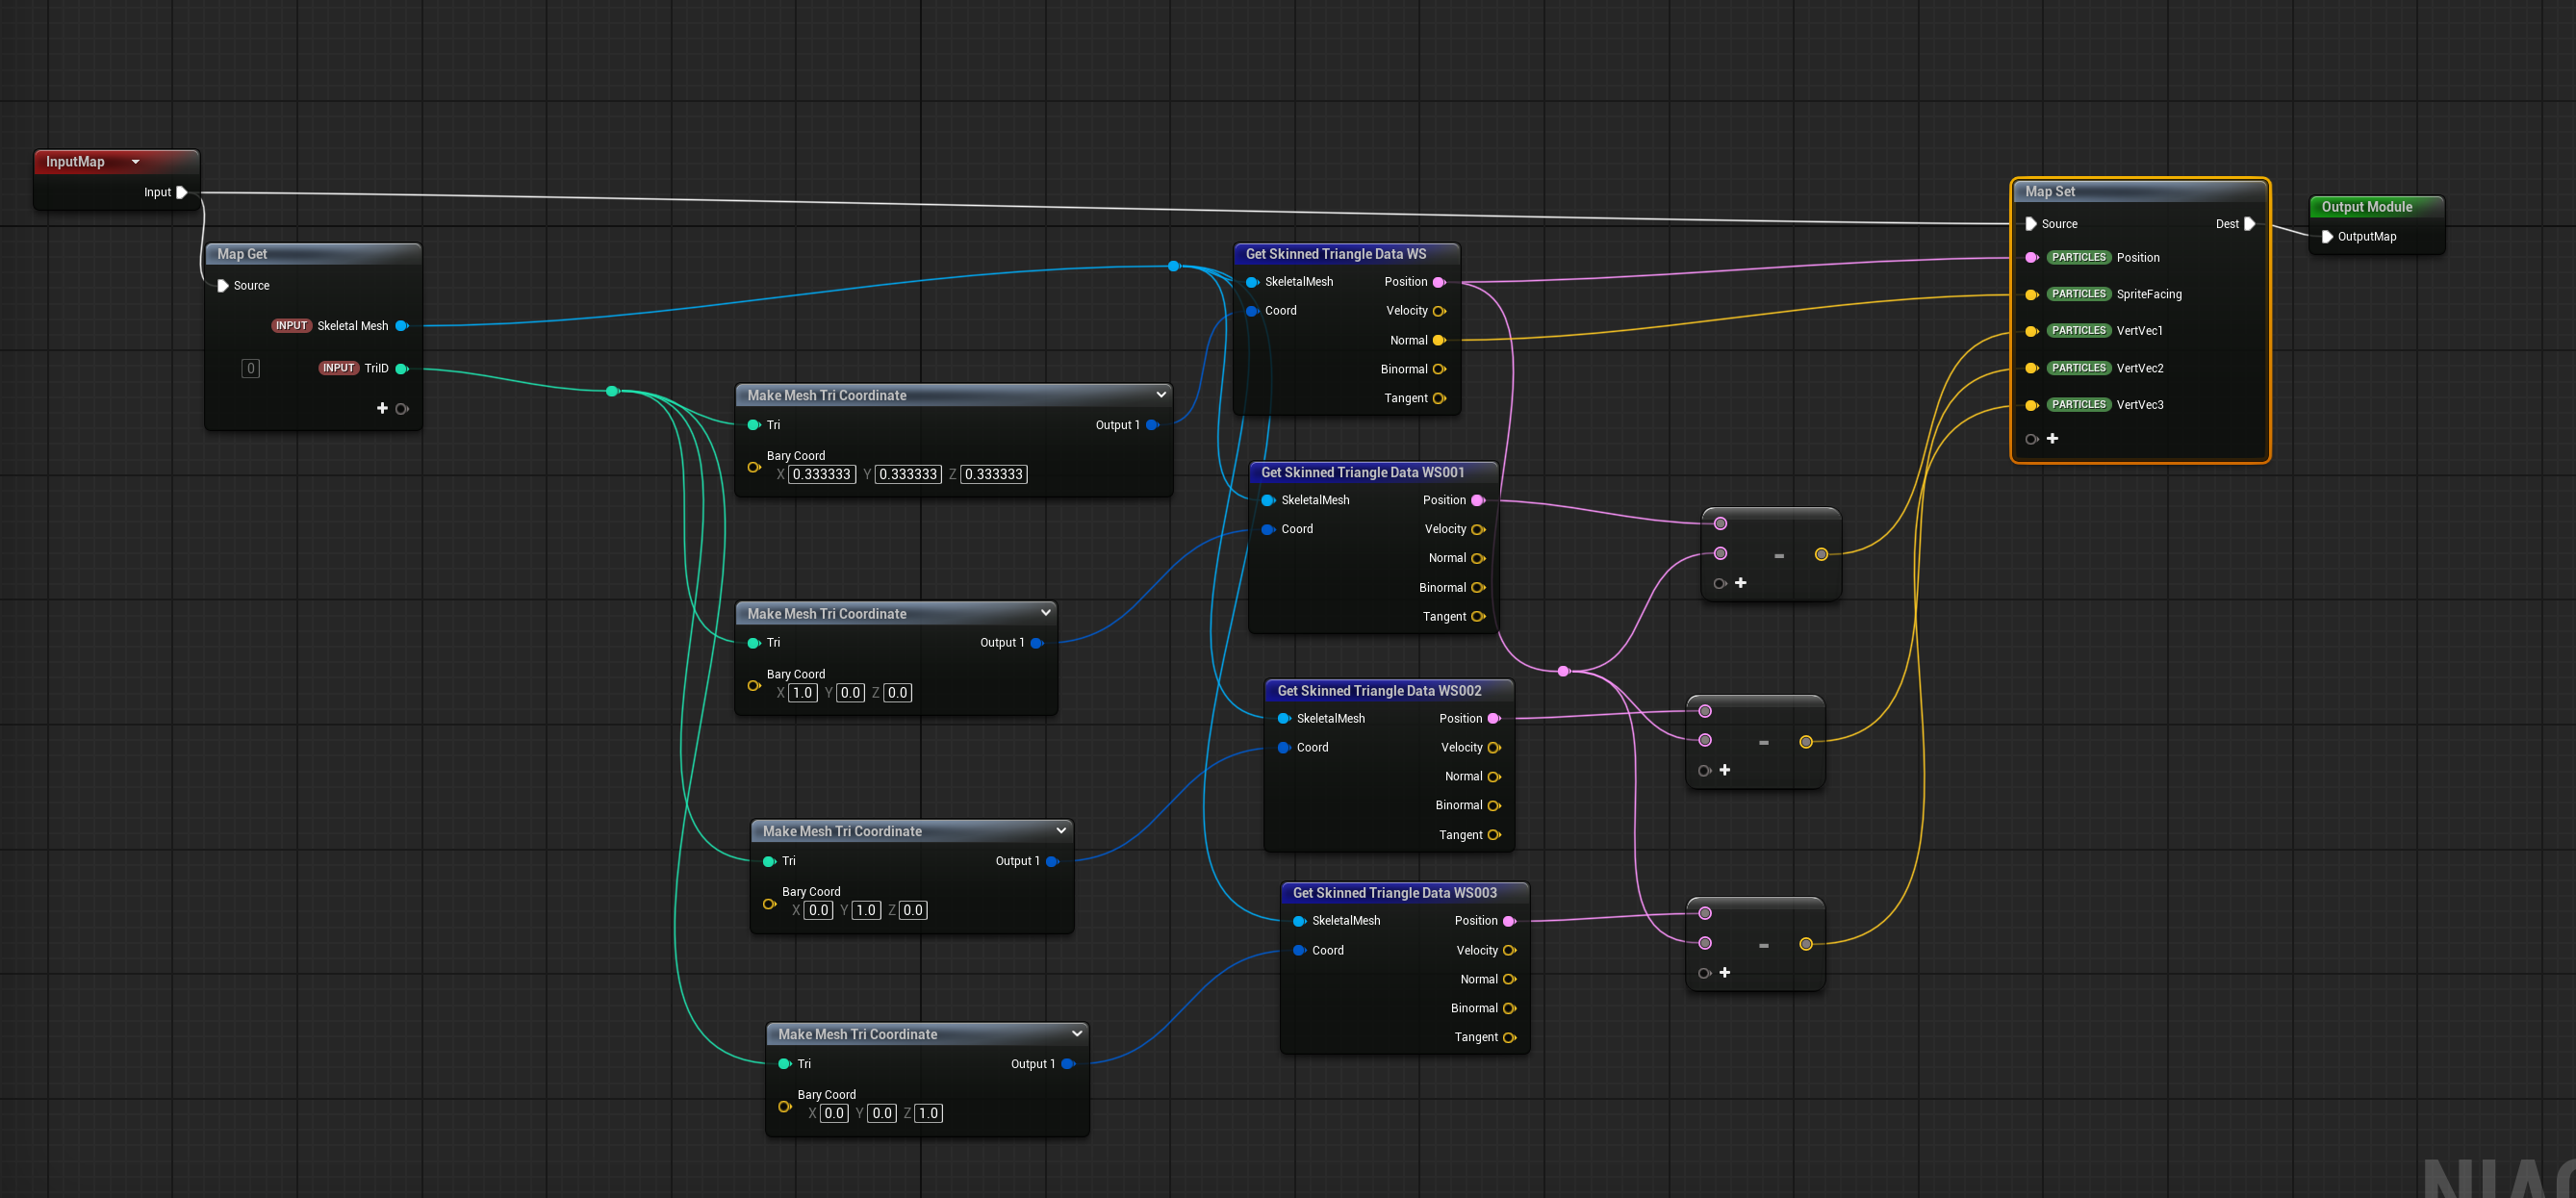
Sampling each polygon's vertex data in Niagara
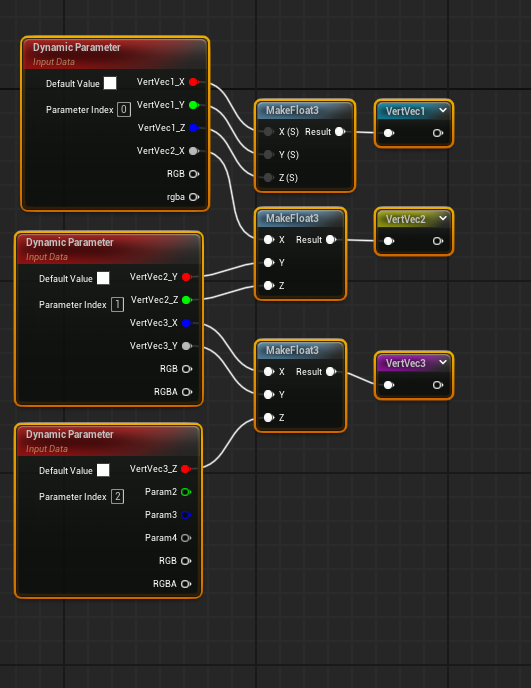
Unpacking the vertex coordinates in the material
Getting the UVs Right
The part that took the most back and forth was the UVs. On the mesh rebuilt from particles they were not sampling correctly at first, so the material came out faceted and broken up instead of smooth. I used a UV and normal debug view to check how each particle was reading its coordinates, and once that lined up the surface finally sampled the texture cleanly.
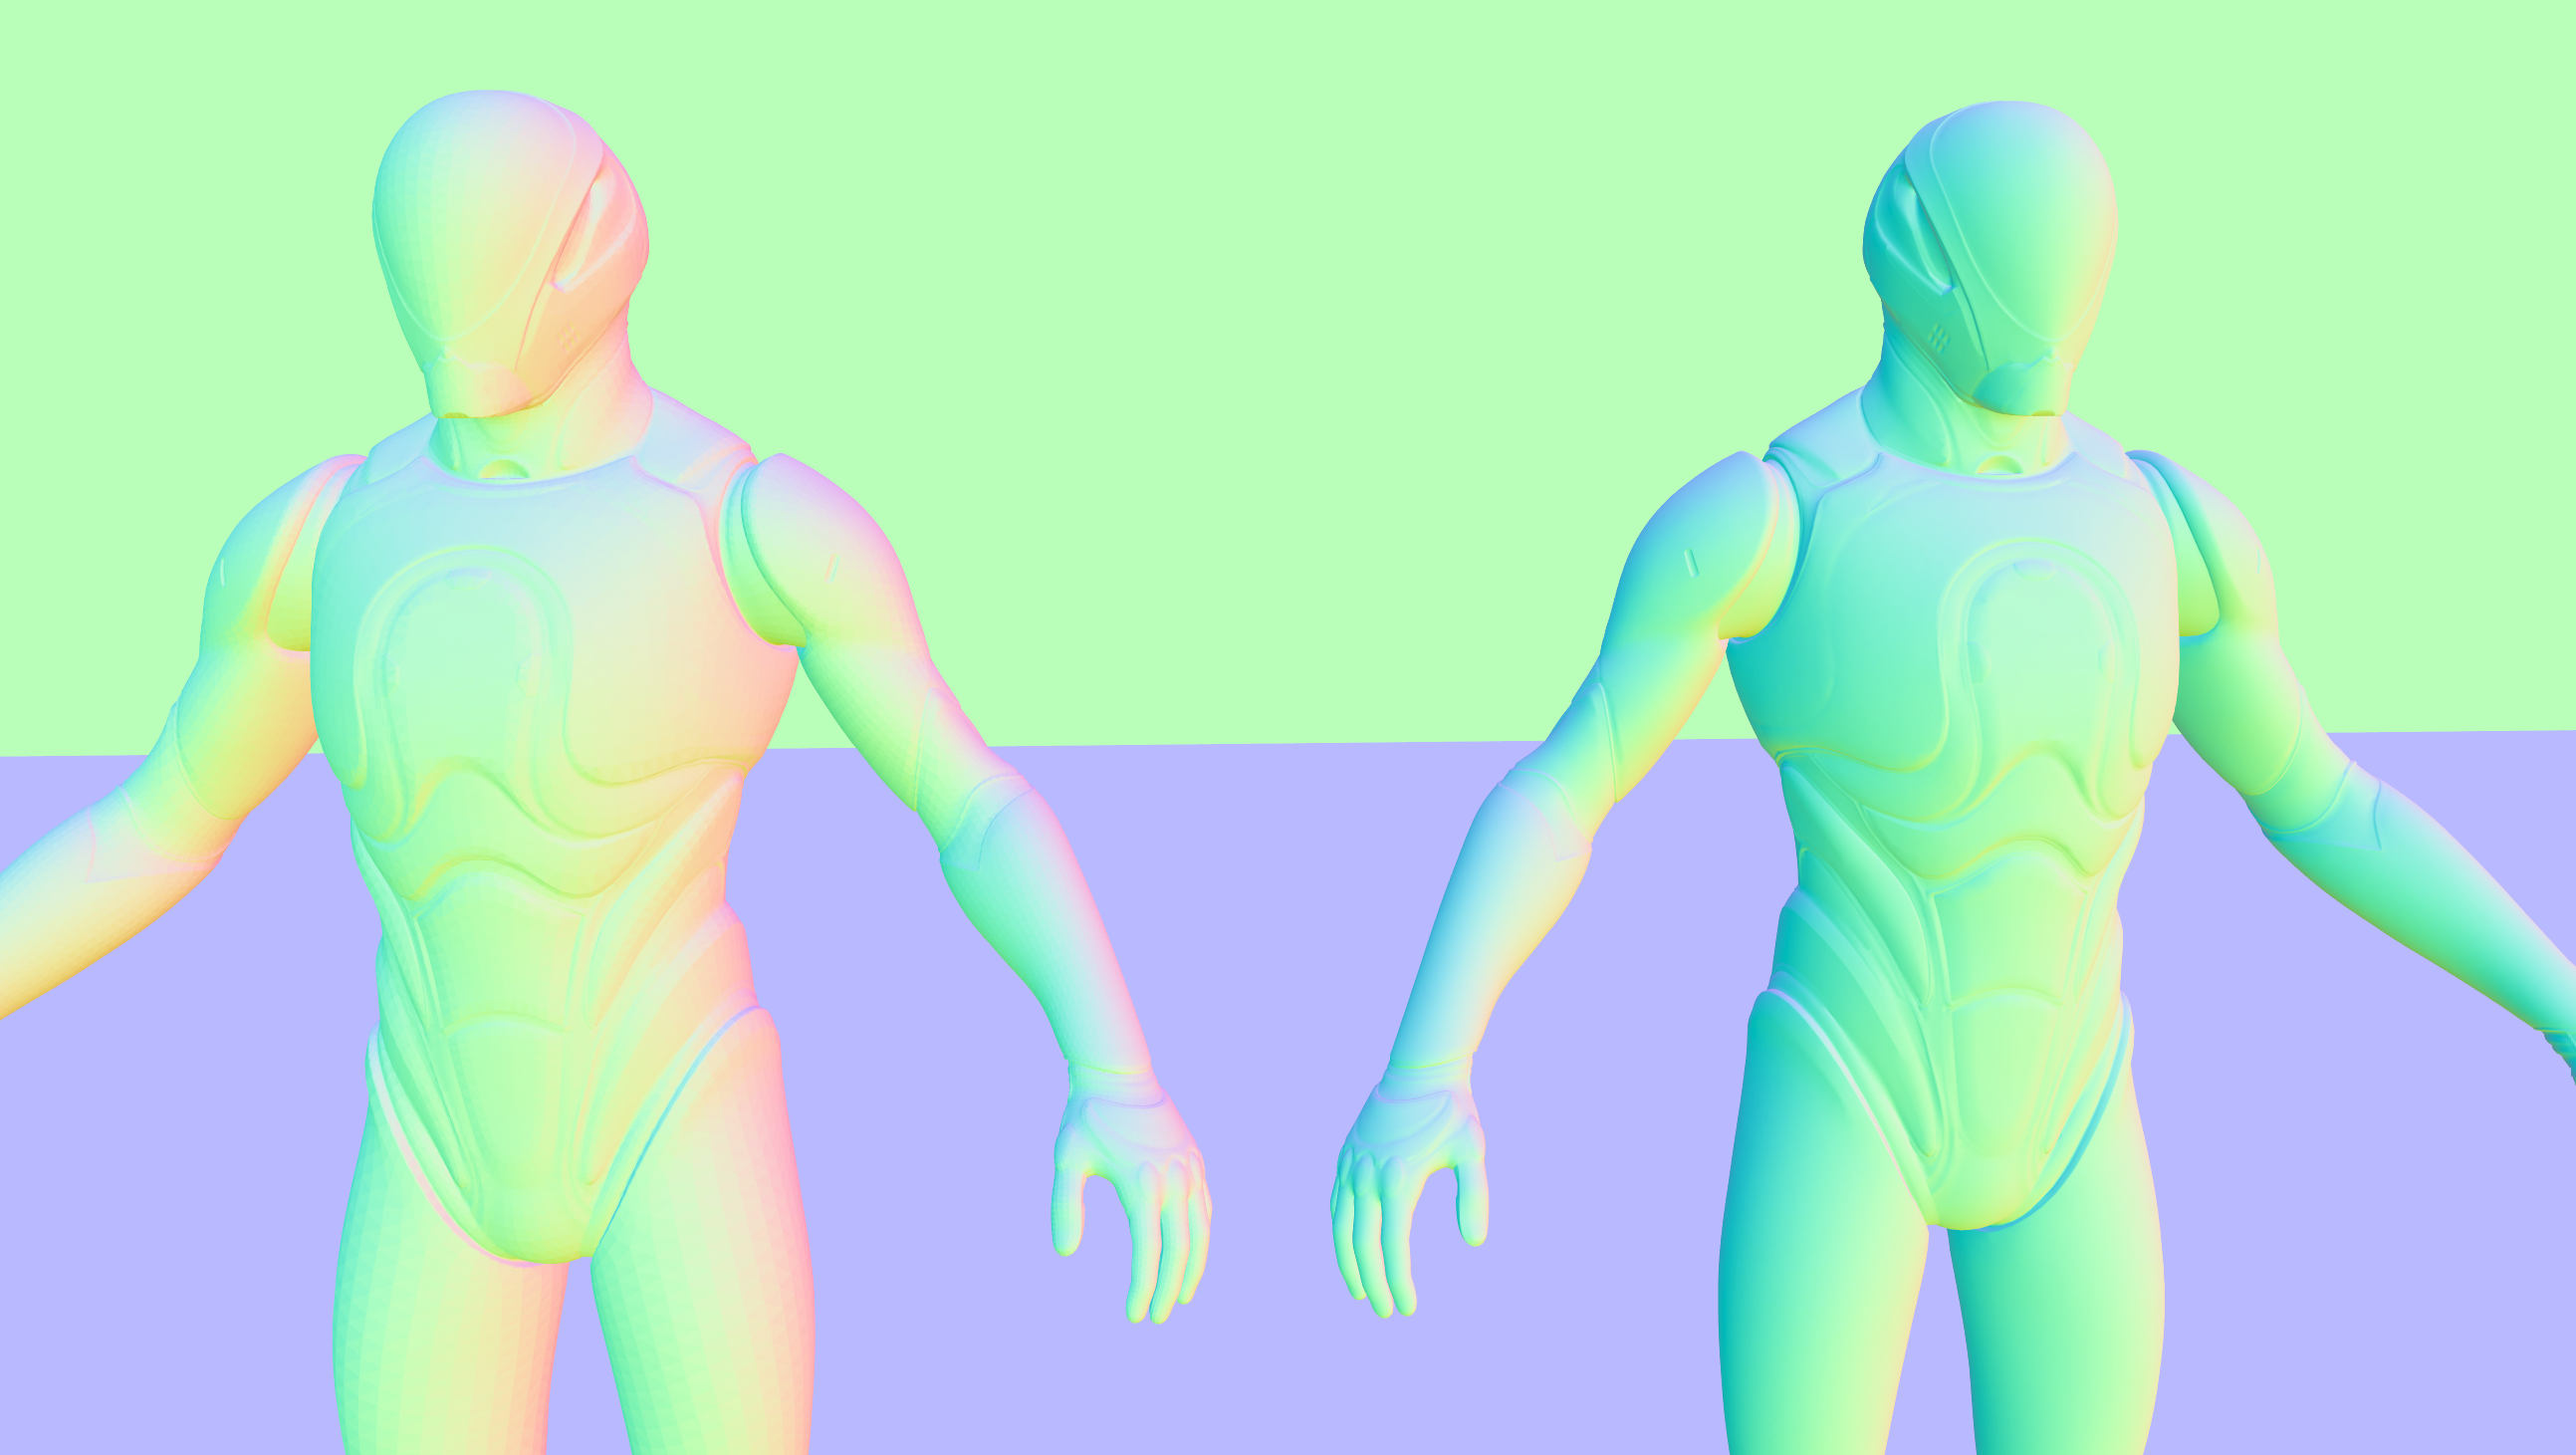
UV and normal debug view
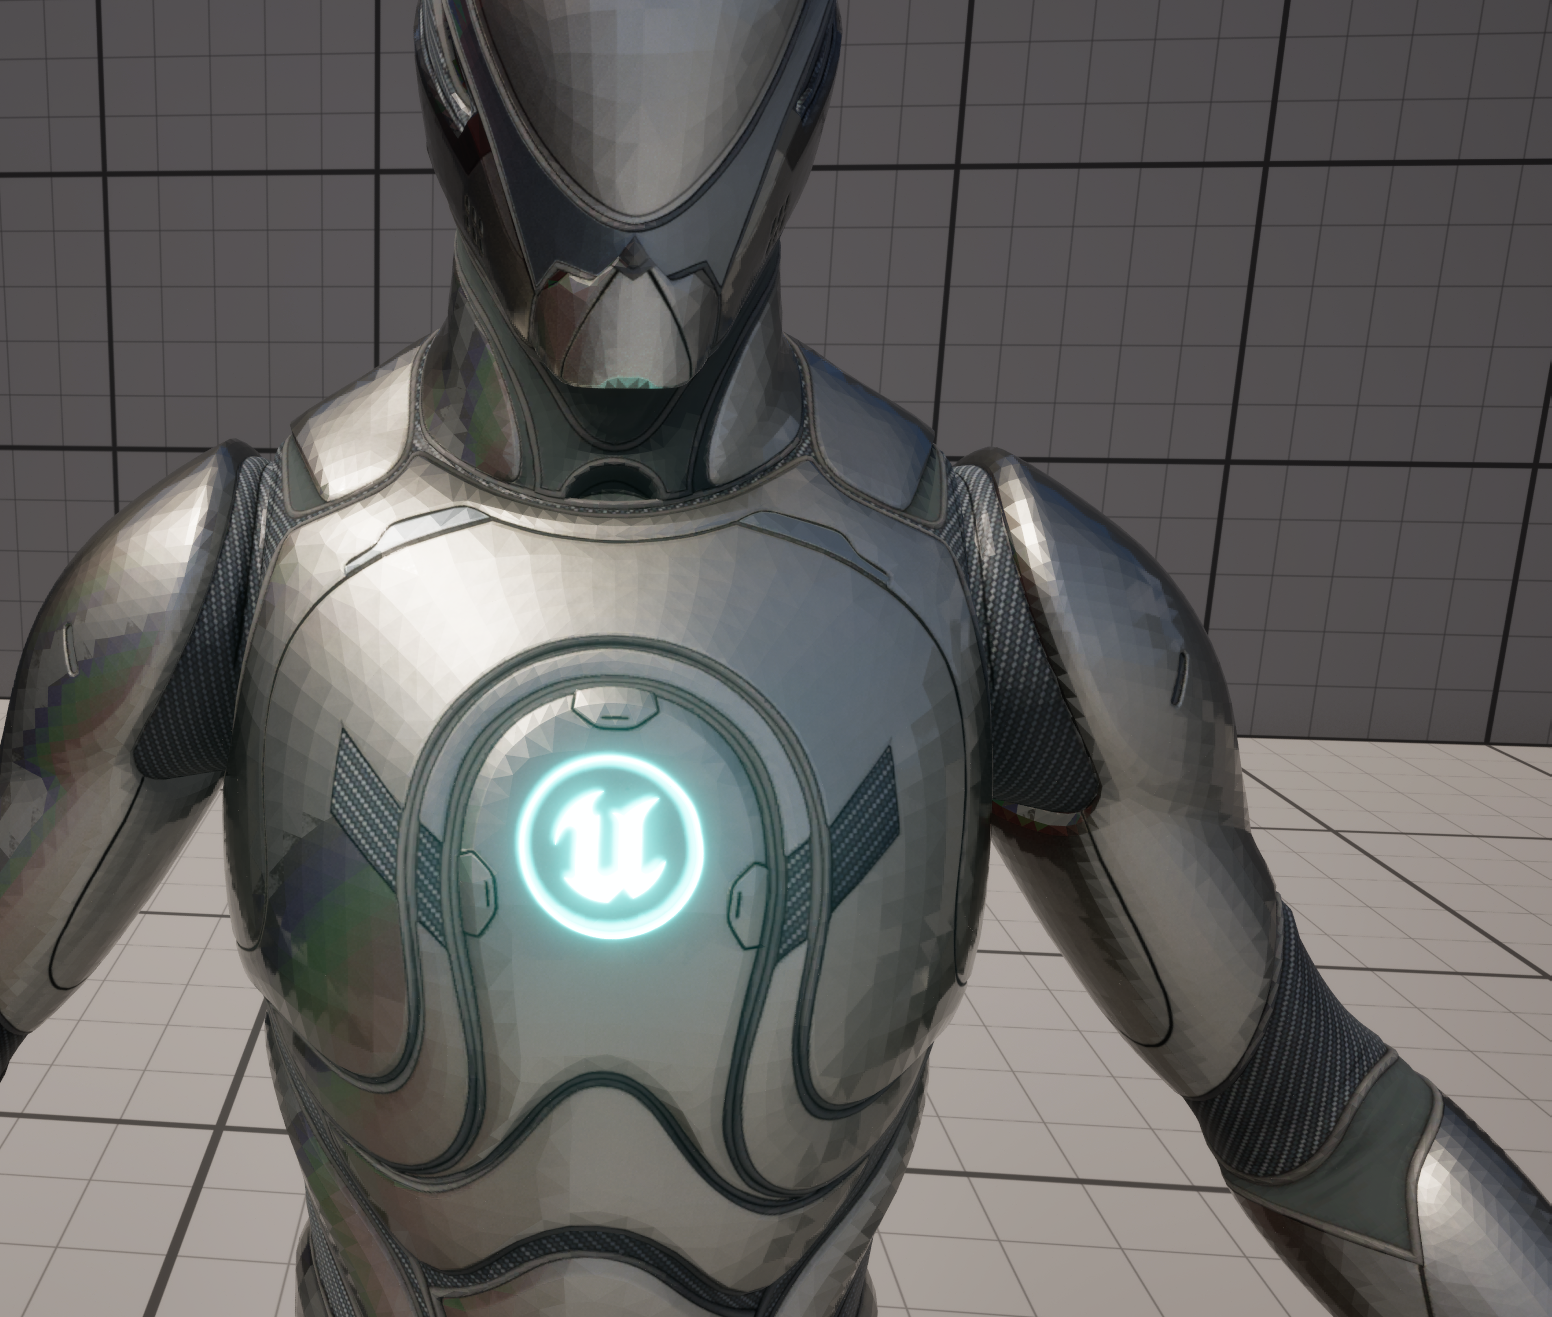
Before, UVs sampling wrong
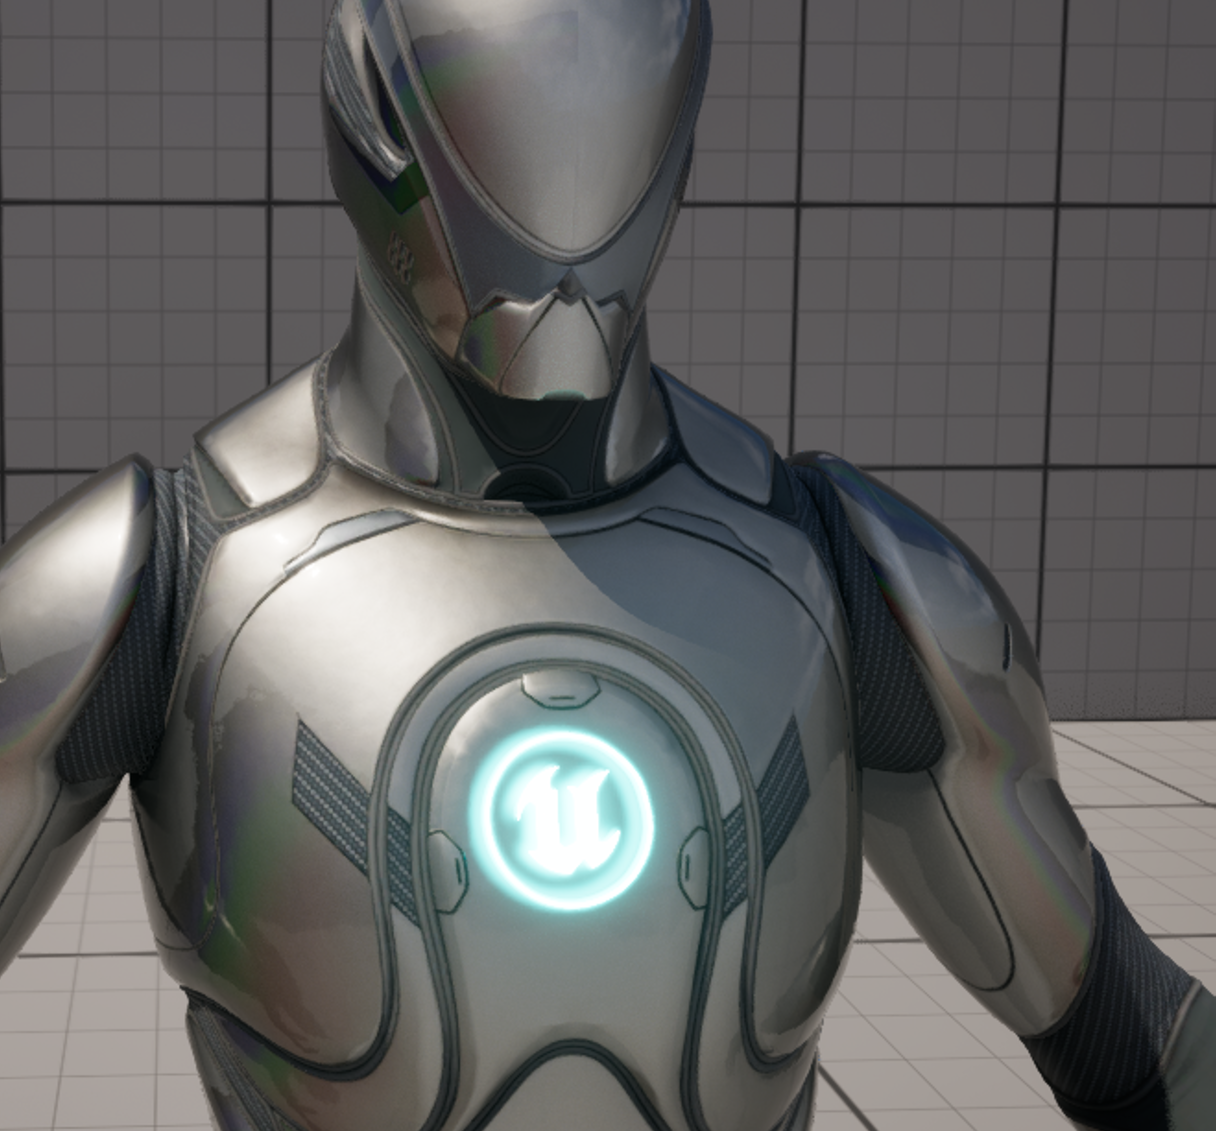
After, sampling correctly
Squares Into Triangles
In the first version each quad splits into triangles as the mesh comes apart. The catch is that the particle is a four-sided sprite, but a triangle only has three vertices. So I map one sprite corner to each of the triangle's three vertices and fold the extra fourth corner onto the last vertex, which collapses the quad into a triangle shape.
A world-position-offset graph handles the actual placement: the UV drives a pair of Lerps across the three vertex vectors, and the result pushes each corner out to sit exactly on its target vertex.
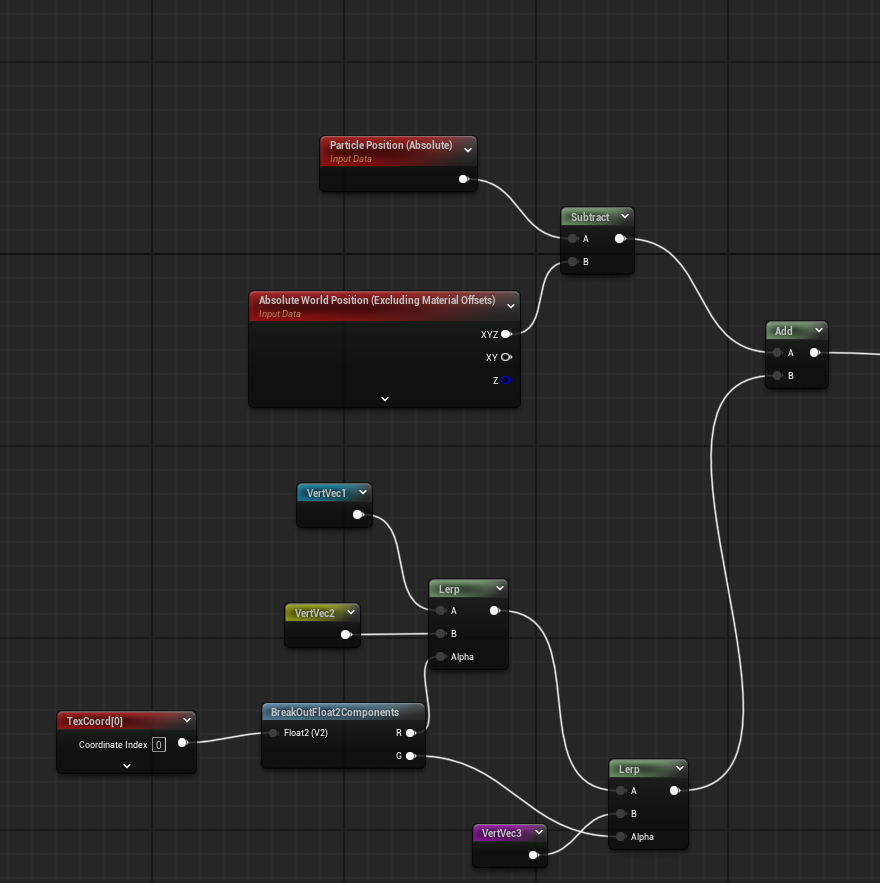
Placing the sprite corners on the triangle vertices
Randomly Scaled Squares
The second version keeps the polygons as squares but scales each one randomly, which gives a nice staggered, directional feel as the mesh forms and falls apart. On top of the Niagara setup, this one adds a bit of material graph work to draw a clean outline on each square.
Squares scaled randomly, with material outlines
The outline is a small material function. I break the UVs into their U and V components, run each one and its inverse through a SmoothStep against a thin edge-width value, and multiply the four results together. That leaves a clean border around every quad, which is what gives the squares their crisp edge as they scale.
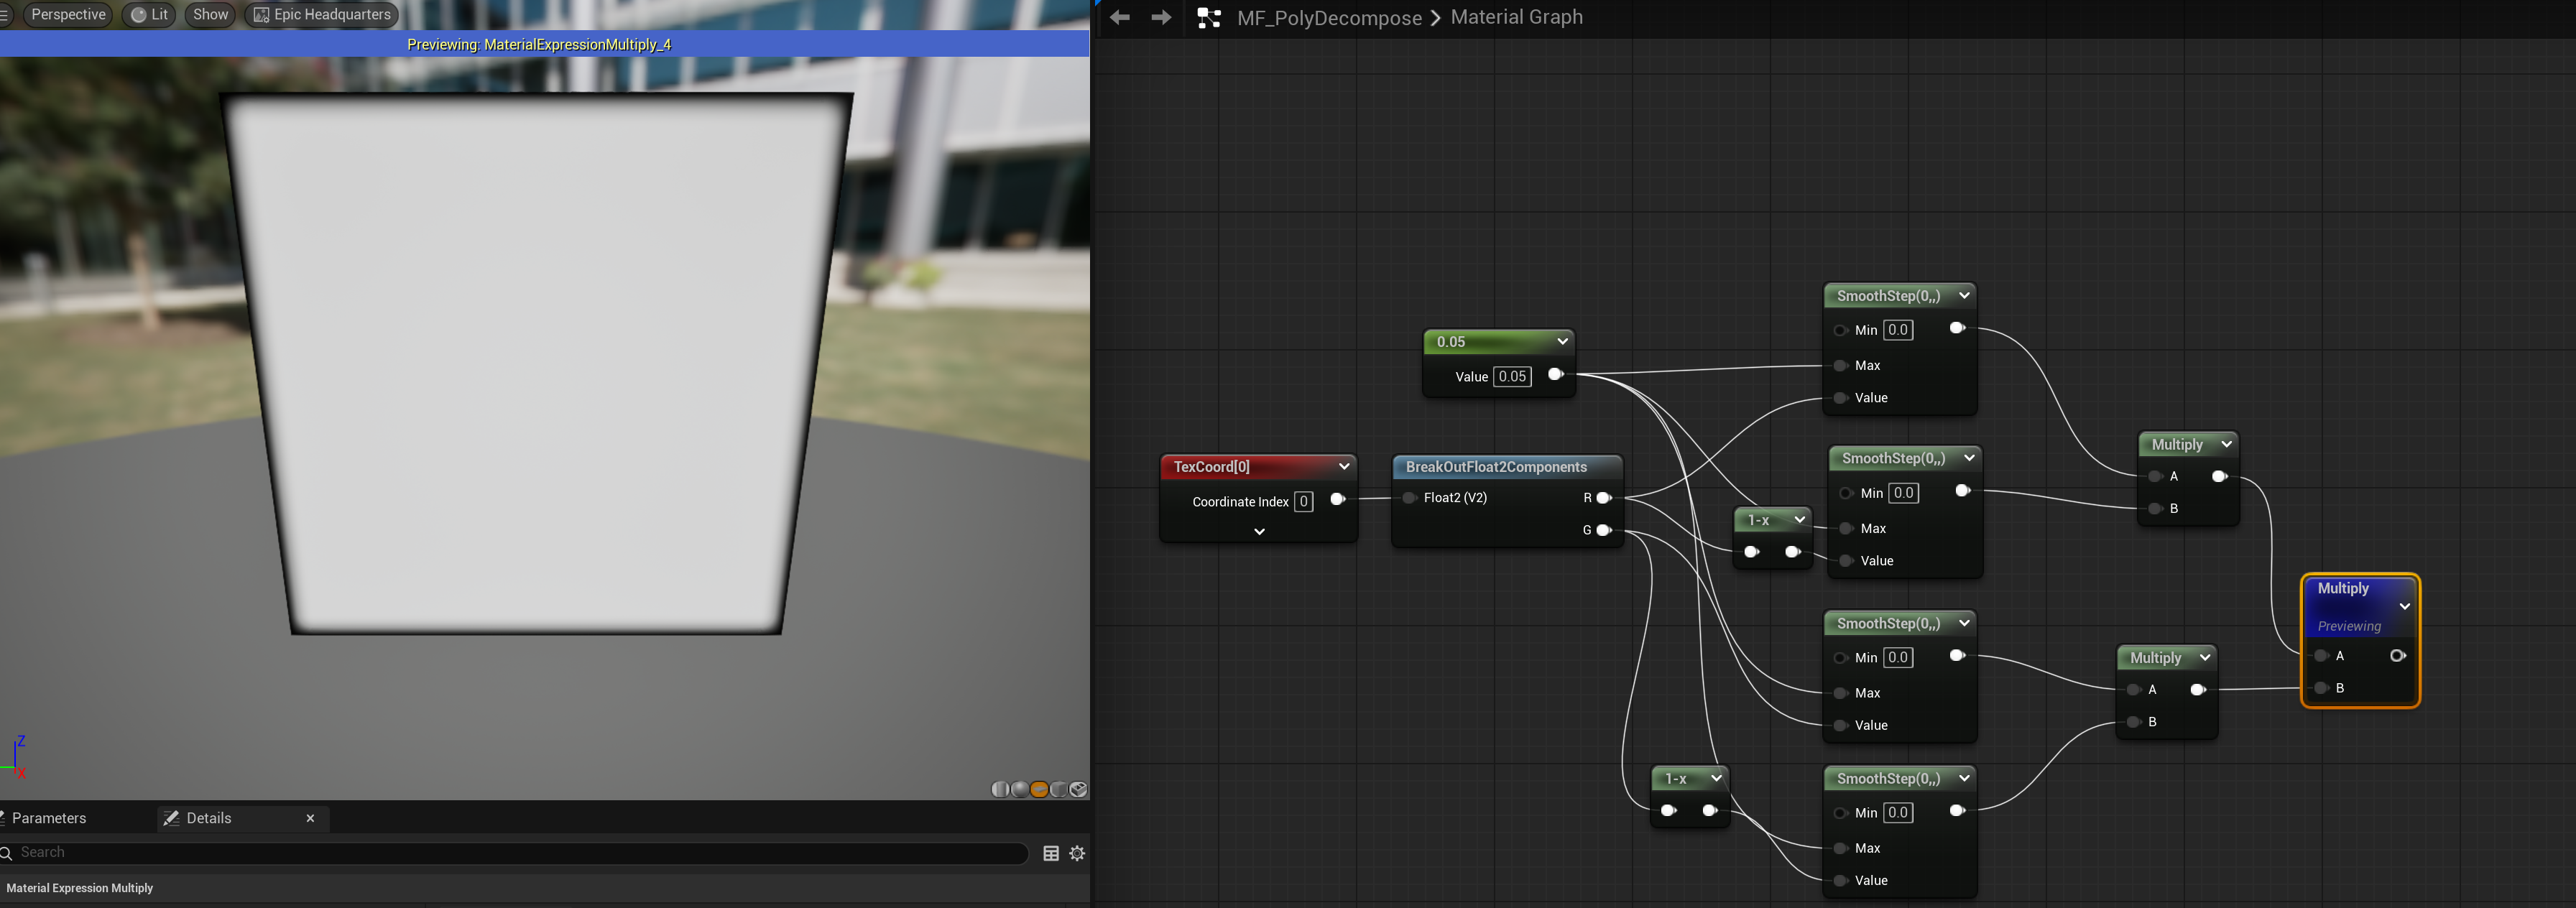
The edge outline material graph
Not much to it once the sampling worked. The interesting part was getting the per-polygon data out of the mesh and onto the particles accurately. After that, both looks were just different ways of animating the same rebuilt cloud.
Tech Stack
Niagara
Per-polygon particles
Mesh Sampling
Skinned triangle data
Dynamic Params
Vertex data to material
Material Graph
Square outlines
Credits
- Character model from Unreal Engine free assets