Cyberpunk Edgerunners Afterimage VFX
A study recreating the iconic afterimage effect from Cyberpunk Edgerunners. The trick is generating particle sprites sized to the mesh's screen-space bounds, then applying a render target mask so only the character silhouette shows. This combines a lot of different techniques: Blueprint scripting, Niagara, stencil masks, render targets, dot products, and screen-to-world projection math.
Reference
Sandevistan afterimage effect from Cyberpunk Edgerunners (Studio Trigger)
My Recreation
With Gaussian blur outline variant:
Table of Contents
Screen Bounds Calculation
First I needed to figure out where the character appears on screen and translate that back to world space. The red plane in the debug view shows the screen-space bounding box projected into the 3D scene.
Screen bounds visualized as red plane
GetScreenBounds takes the mesh's 8 bounding box corners, projects them to screen space, then grabs min/max X and Y to get the rectangle.
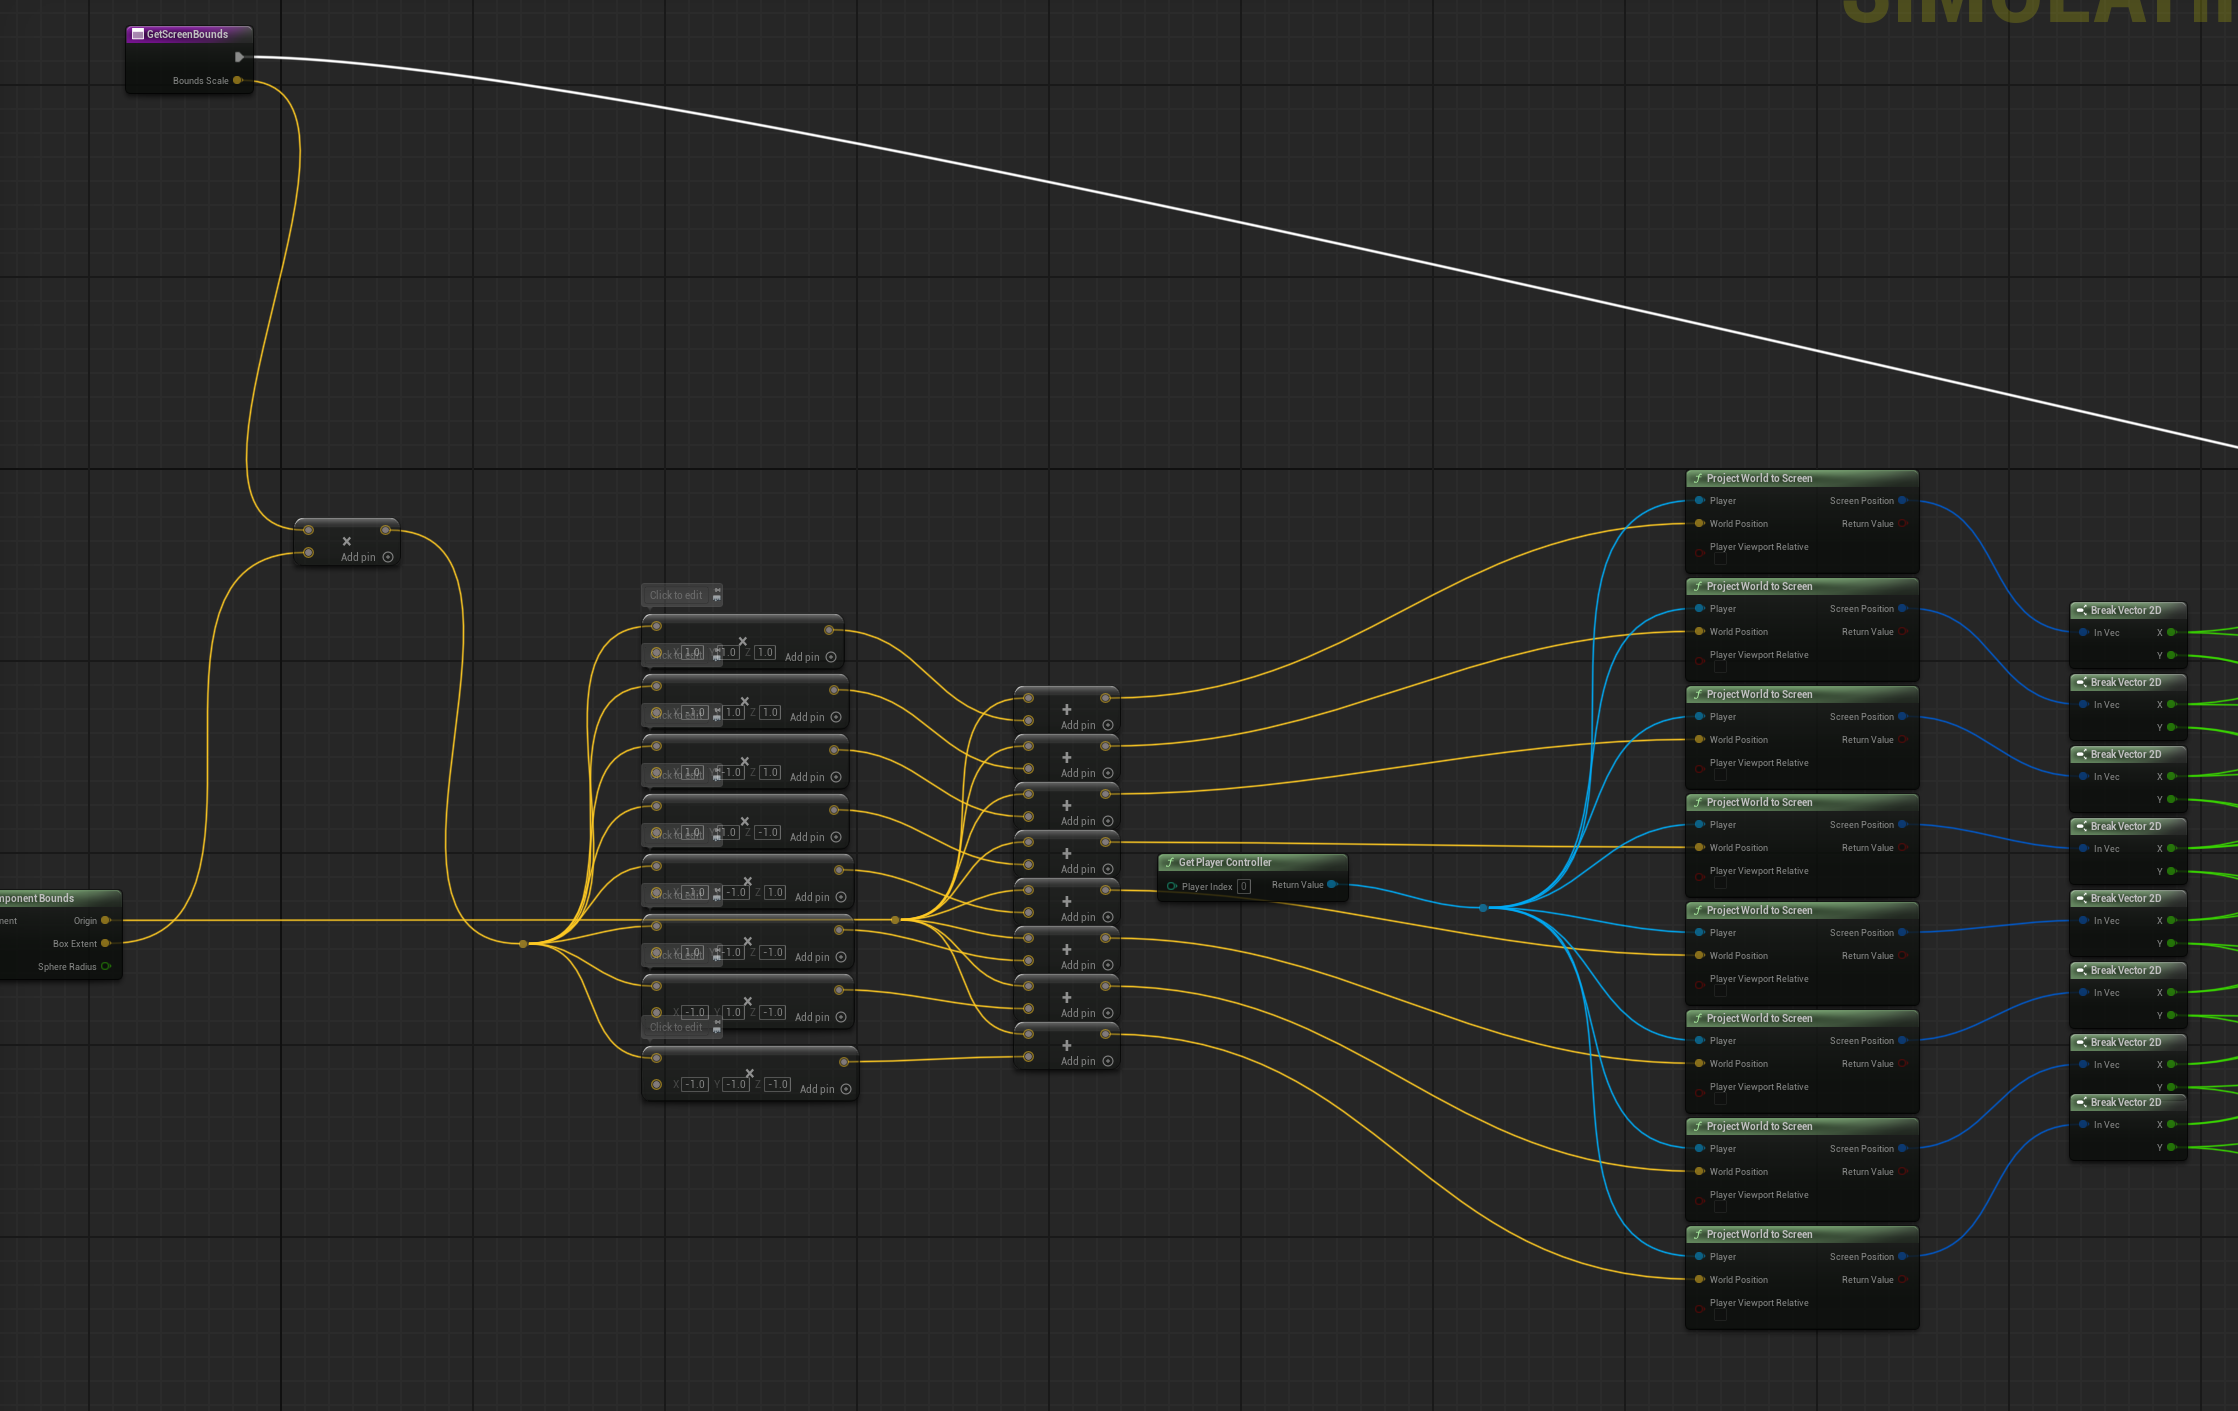
GetScreenBounds function with 8-corner projection
World Position from Screen Space
This is the tricky part. I can't just use the screen center directly in Niagara - Niagara needs a world position. But Unreal doesn't give you a "screen position to world position" node easily in Blueprint because screen space has no depth - it's a 2D point on an infinite ray.
The solution is a sprite plane trick: I construct an imaginary flat plane in front of the camera, like a canvas floating in 3D space, always facing the camera. This is the "screen sized sprite". Everything from here is just finding where on that plane the screen bounds center lands.
The key math is CameraForward · (WorldPoint - CameraPosition) - this gives me the distance along the camera's view direction to any world point, which is the depth I was missing. Once I have the depth, I can place my imaginary plane at that distance and figure out the exact world position that corresponds to the 2D screen center.
The final position calculation uses Pythagoras to compute the XY offset on that plane using the camera's right and up vectors:
WorldPos = CameraPos
         + CameraForward × depth
         + CameraRight   × offsetX
         + CameraUp      × offsetY
Now I have an actual world position that visually sits exactly at the screen bounds center. Niagara spawns a sprite there, facing the camera, and it perfectly overlaps the character in screen space.
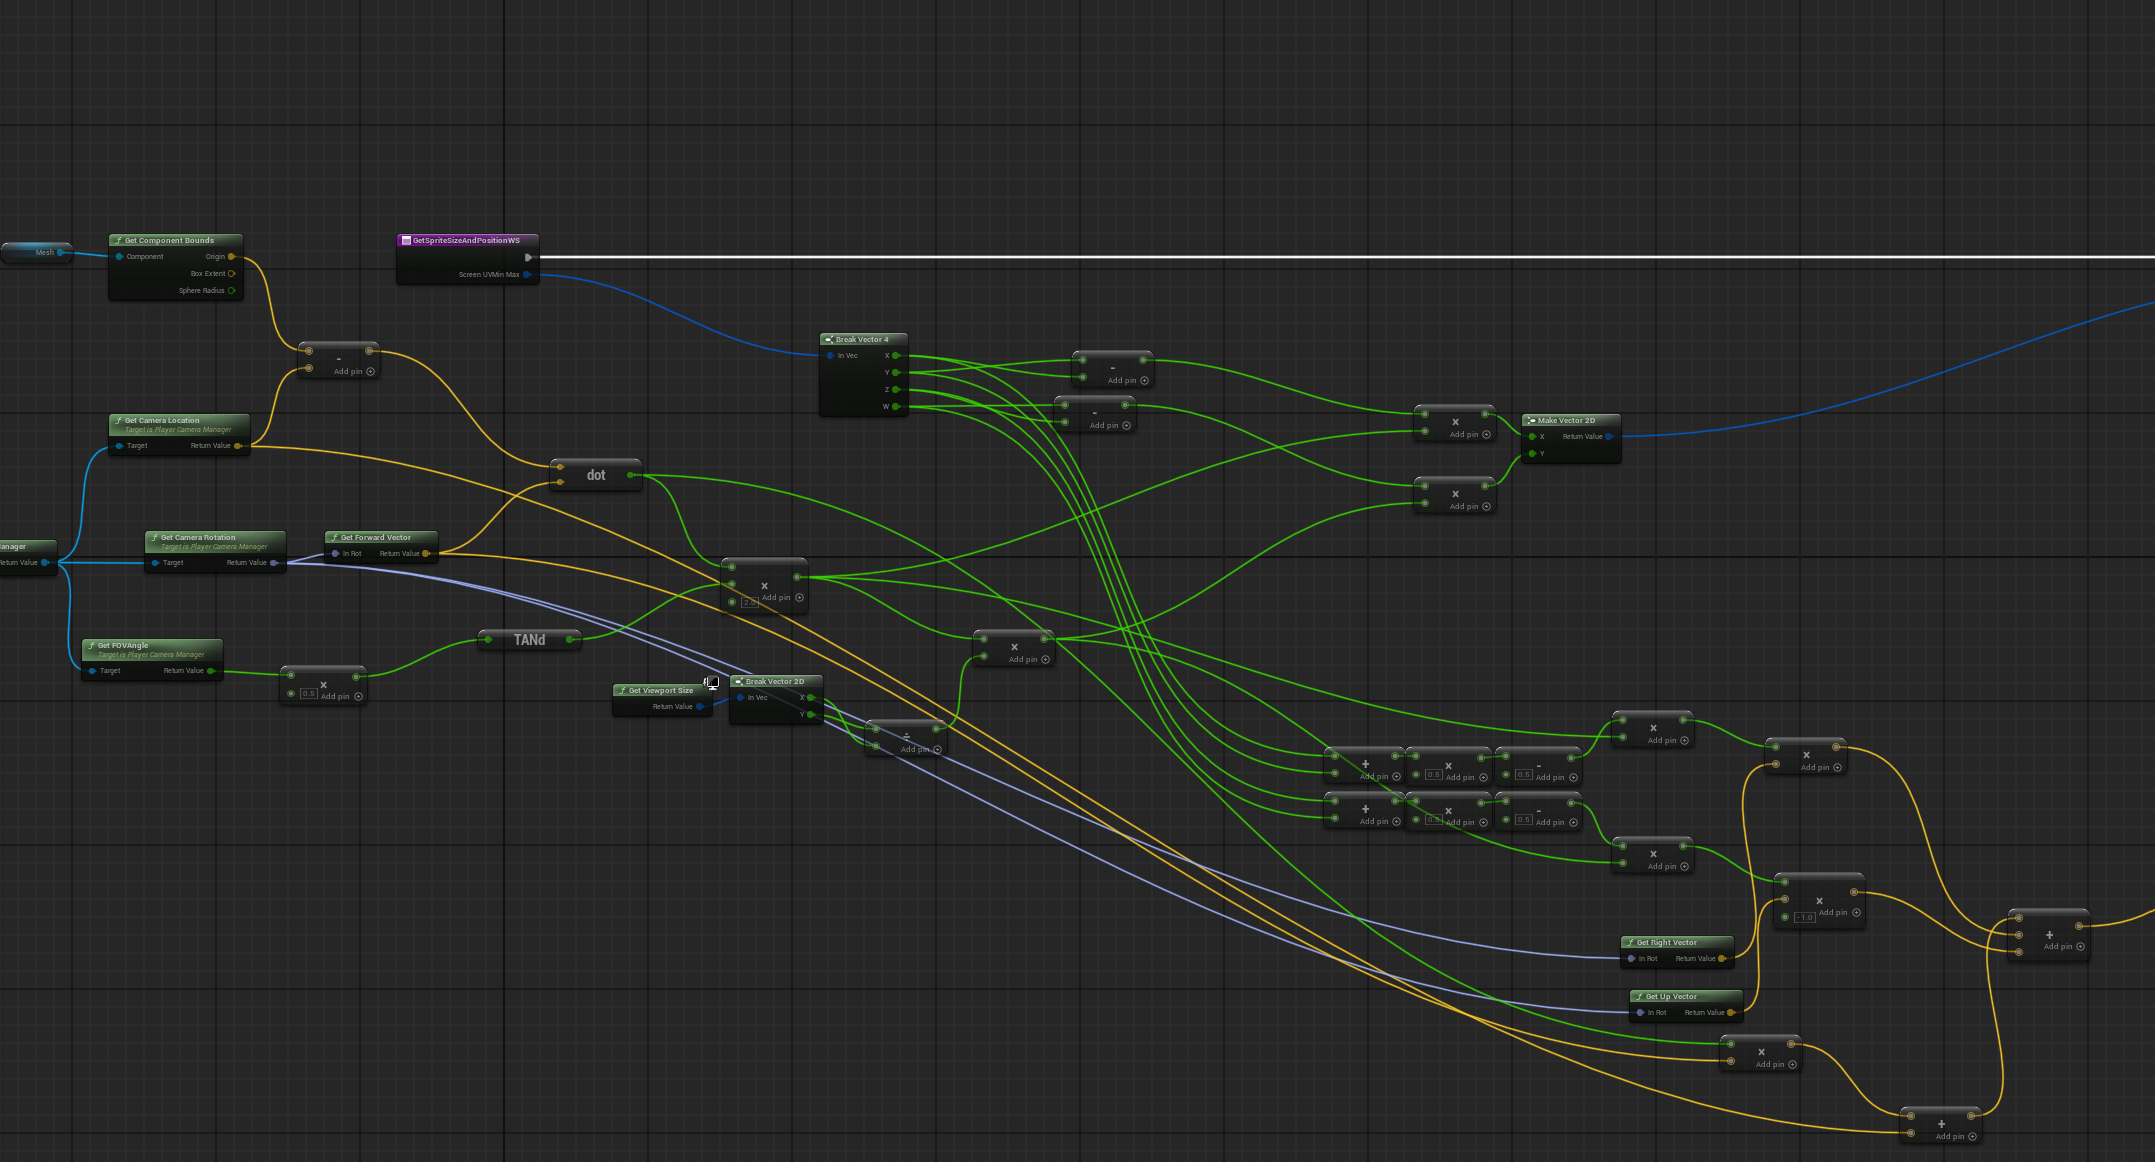
Camera FOV and dot product math for world position
Spawning the Afterimage
The main spawning logic: spawn a Niagara system at the character's location, get the current screen bounds, create a render target sized to match, then pass all the data (sprite size, position, render target texture) to the Niagara system as variables.
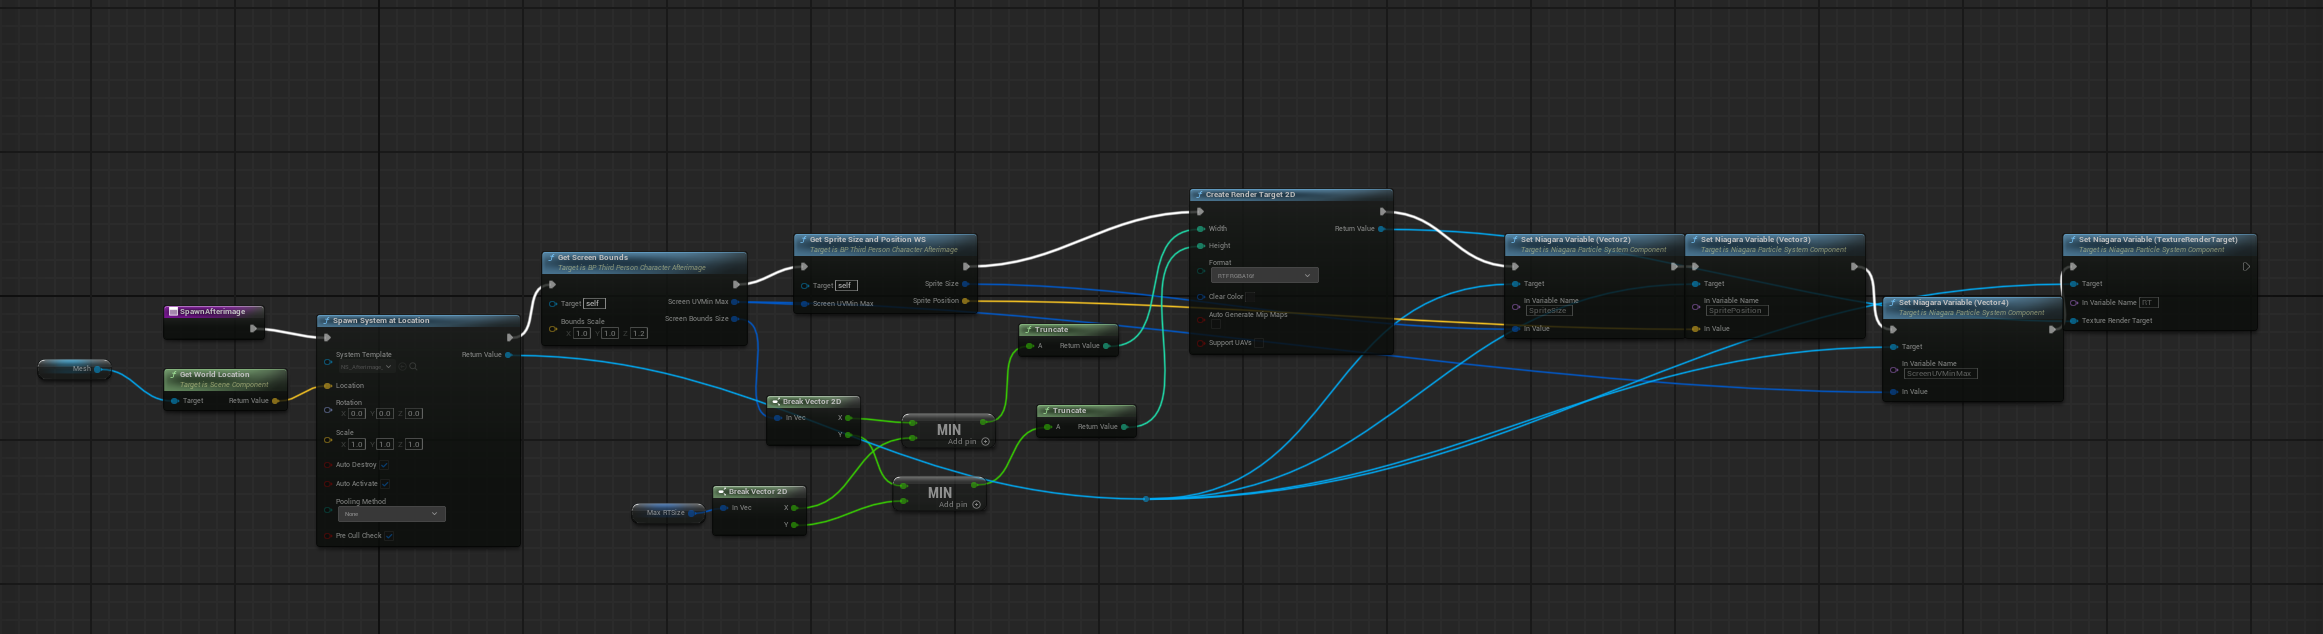
Spawn system with render target creation
Afterimage Outline Material
The actual Edgerunners effect doesn't have an outline - but I added one as a bonus since it gave me a chance to experiment with Gaussian blur. The material reads the render target, applies the blur for softness, then uses edge detection (subtract, abs, multiply) to extract just the outline.
Colors are handled in Niagara but sent to the material for drawing and mixed with the render target values. The particle color input controls the neon glow tint, and it outputs to emissive for that bright look.
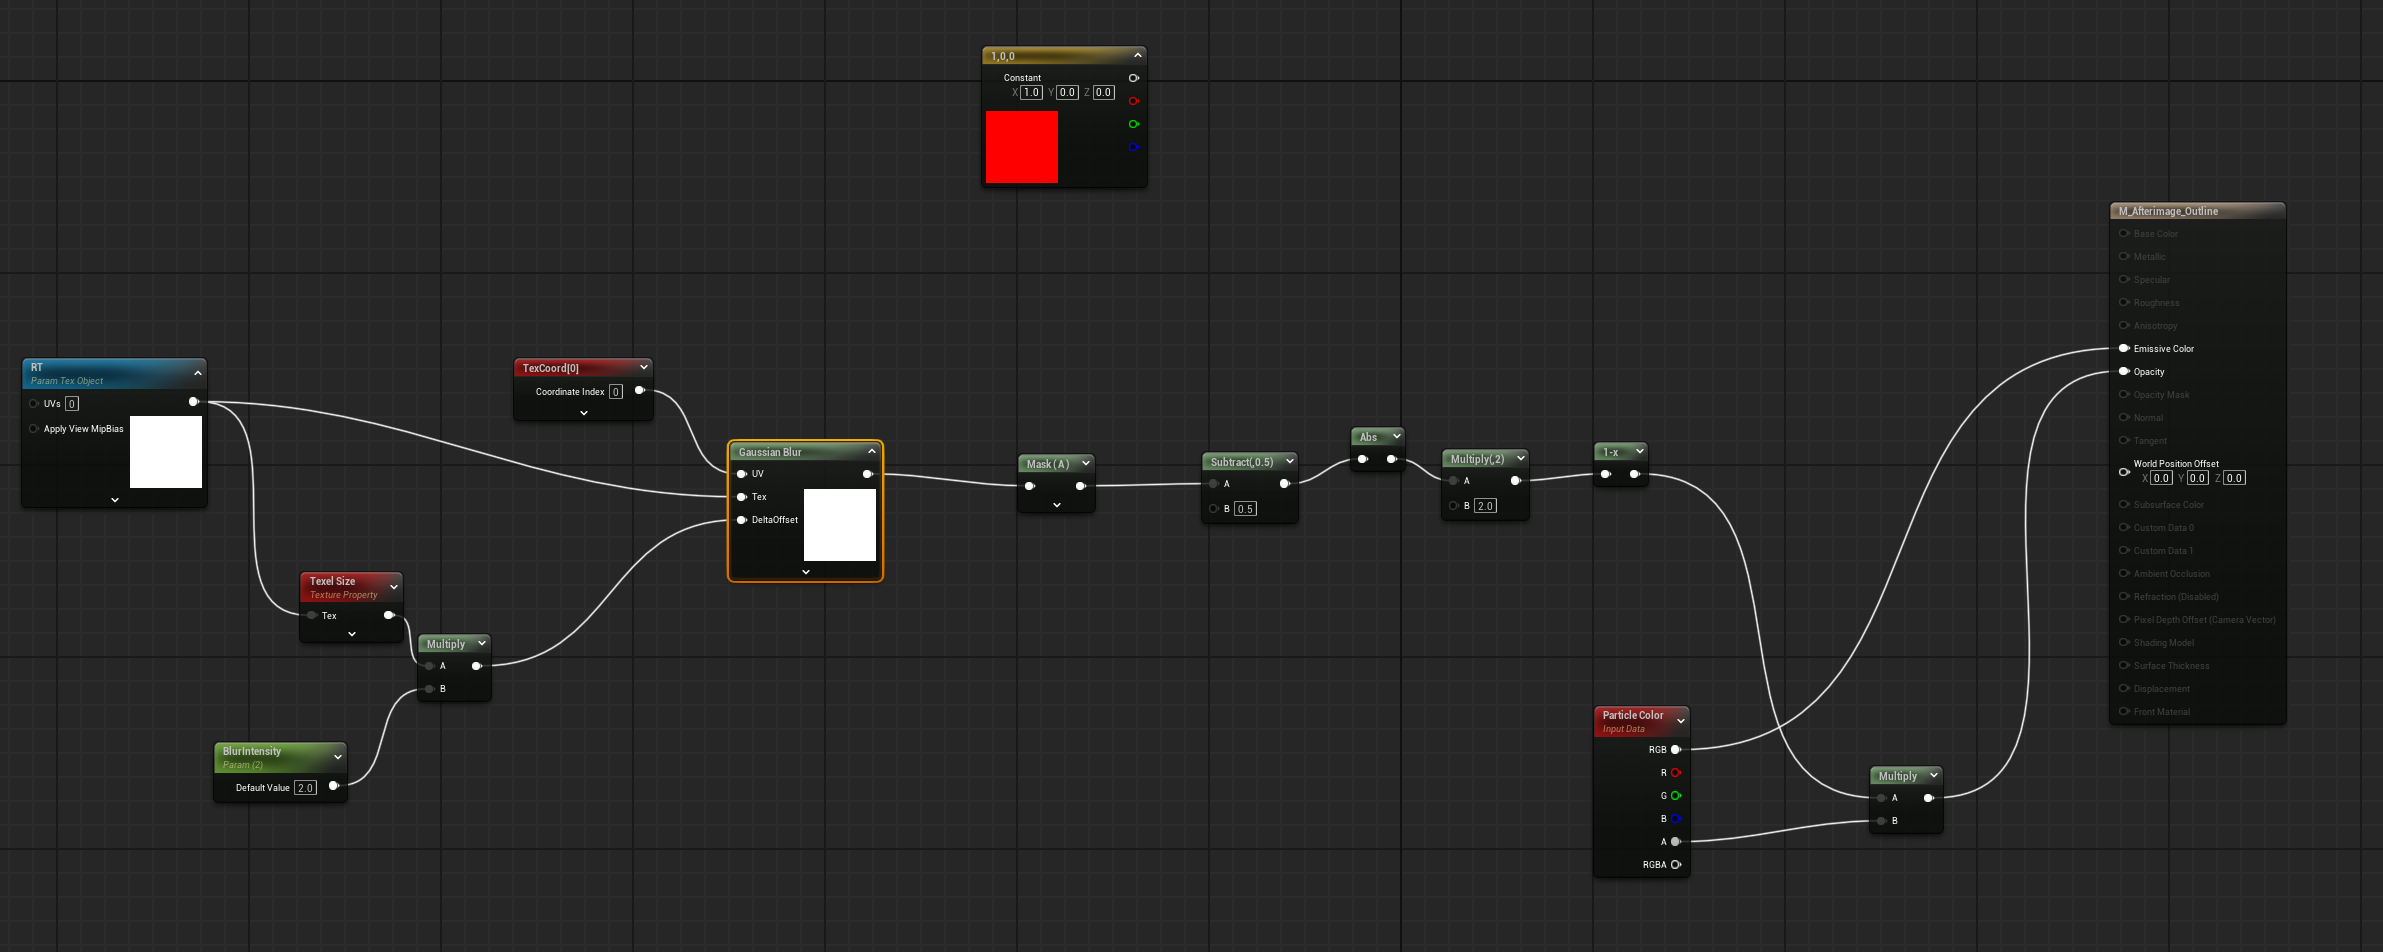
Blur + edge detection for outline extraction
The effect works, but to really nail the anime look I'd need to add a toon shader and some lighting or post-processing work - in the anime, when David activates the Sandevistan, the background gets a green hue/saturation shift. That said, I'm very satisfied with the result as a technical exercise: it's a great demonstration of render textures, Niagara, materials, and Blueprint all working together for different purposes.
Tech Stack
Niagara VFX
Sprite particles
Render Targets
Character capture
Stencil Buffers
Masking
Blueprint
Bounds & spawning
Dot Product
Projection math
Gaussian Blur
Edge softening
Credits
- Reference: Cyberpunk Edgerunners (Studio Trigger / Netflix)
- Character models from Unreal Engine free assets